Dear Community !
November 19th, the Public preview started and was announced in this article. A few days earier Steven Bucher from the PowerShell team informed PowerShell MVPs that ther is an early alpha version of the product available on Github.
So it seems that AIShell is the next big thing in Powershell and it might be so common in the future as the much loved PSReadline module.
So lets try and awake AIShell-preview-1 to life on my macOS machine and see which steps are required.
Things to know
- AI Shell comes as an executable file aish(.exe on Windows) including libraries and surrounding code.
- In addition, there is the PowerShell Module AIShell in public preview, which is some sort or wrapper around aish for easier integration and usage on the commandline.
- Preview-1 only works on the macOS terminal application iTerm2, which everybody „should“ have on his machine as its pretty popular.
As of writing this blog (12/24) the PowerShell module doesnt work on macOS. If you are on Windows, give it a try.
Install AIShell on macOS
Microsoft offers an installation script. This covers and detects platforms and installs aish on your machine. If you run Invoke-Expression "& { $(Invoke-RestMethod 'https://aka.ms/install-aishell.ps1') }" you get aish on your box and the directory looks like this:


Configuration files are setup in ~/.aish
So if you run aish the very first time you see this screen.
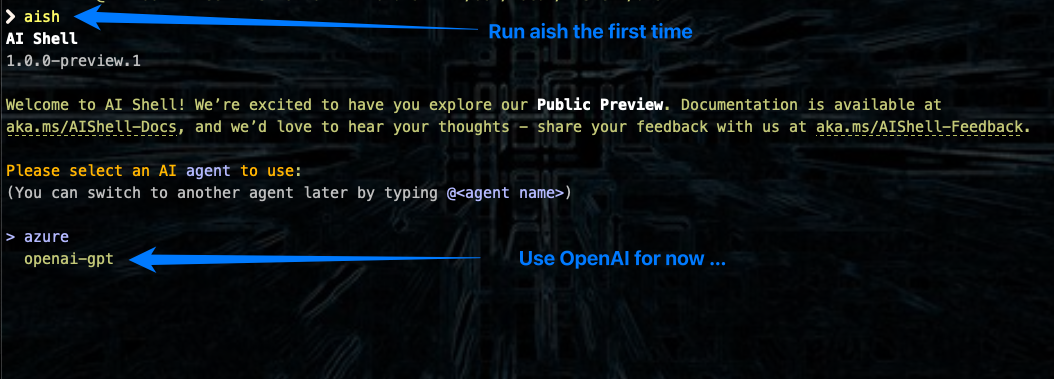
The 2 options available are:
- Azure – Azure Copilot, AI helper in Azure
- OpenAI – Either the public OpenAI Service of an instance of OpenAI in Azure.
Configuration files
aish stores its configuration in the users directory ~/.aish. A quick look at the folder structure shows us:
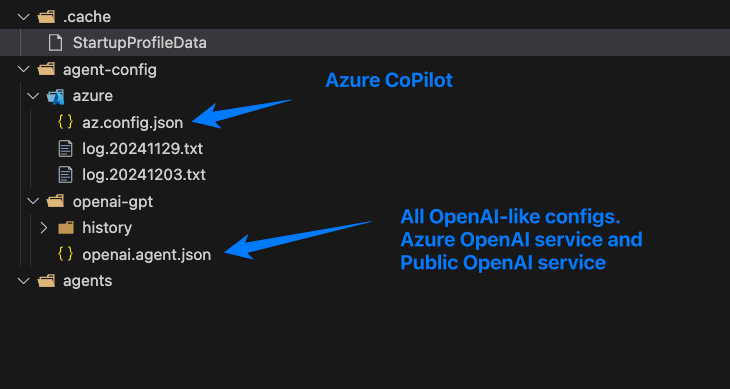
Azure Copilot Configuration
For Azure copilot the config file just has 2 entries.

Leave them both active to get logs and help the developer get telemetry info for bugfixing/performance. a typical logfile logs like this:

Connect to OpenAI – public
In the file ~/.aish/agent-config/openai-gpt/openai.agent.json you find the second part, already prepared for public OpenAI Service. Remove all the // remarks and reduce it to the following code.
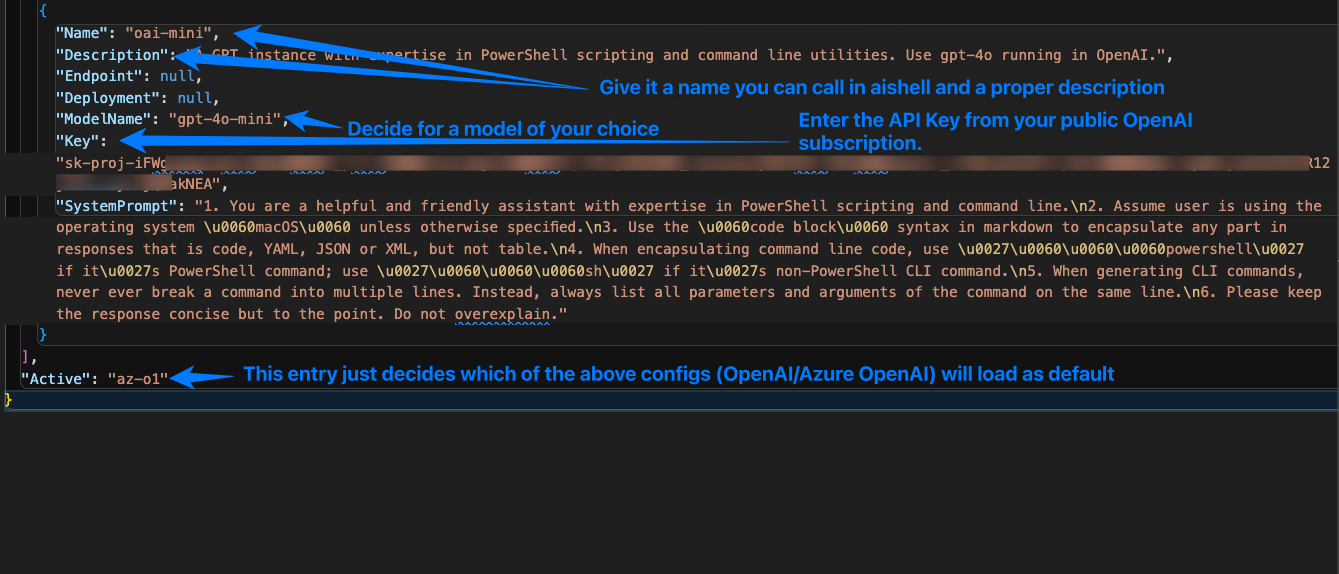
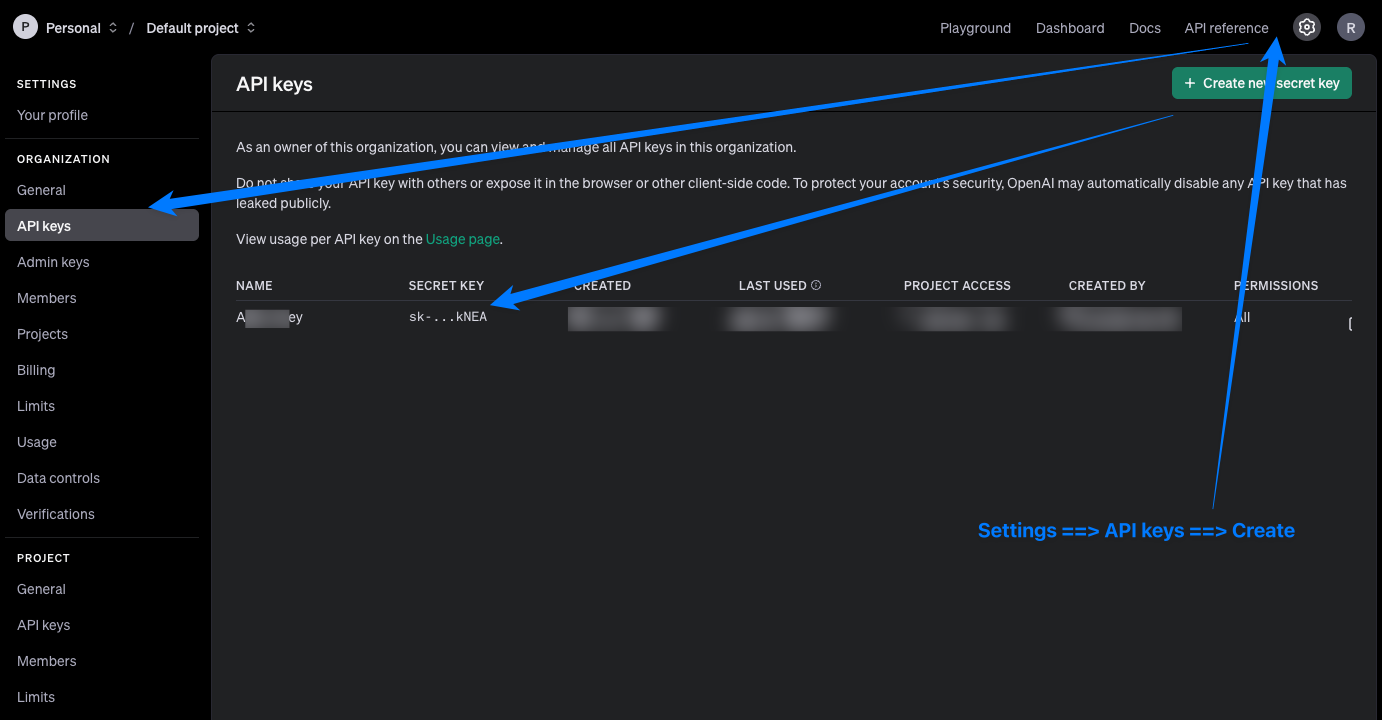
To get an OpenAI public-key login and open your account on https://platform.openai.com. Go to Settings ==> API Keys ==> Create a new API Key and copy the value into the config file above.
This should do it, that worked pretty quick on my machine.
Create and connect to Azure OpenAI instance
1. Login to your Azure Account via https://portal.azure.com
2. Create a new resource Group for your OpenAI service, i.e. „p-rg-OpenAI“.
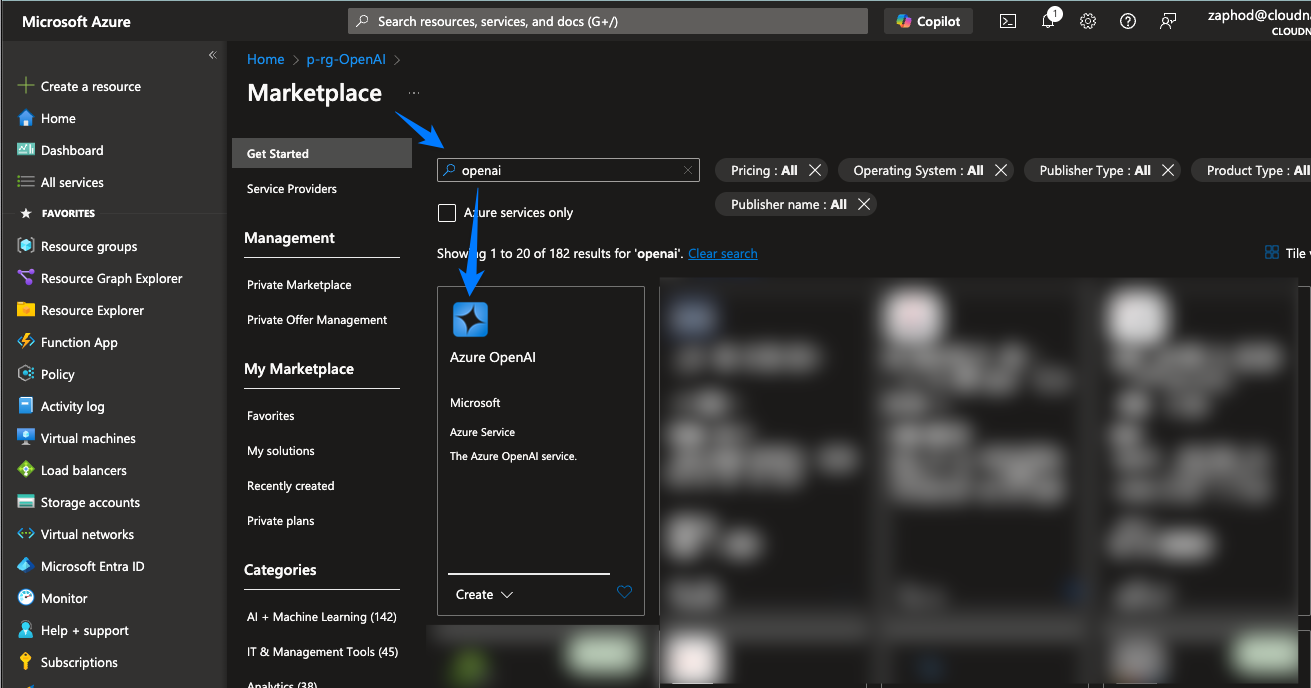
Once created, use Azure AI Studio to continue.
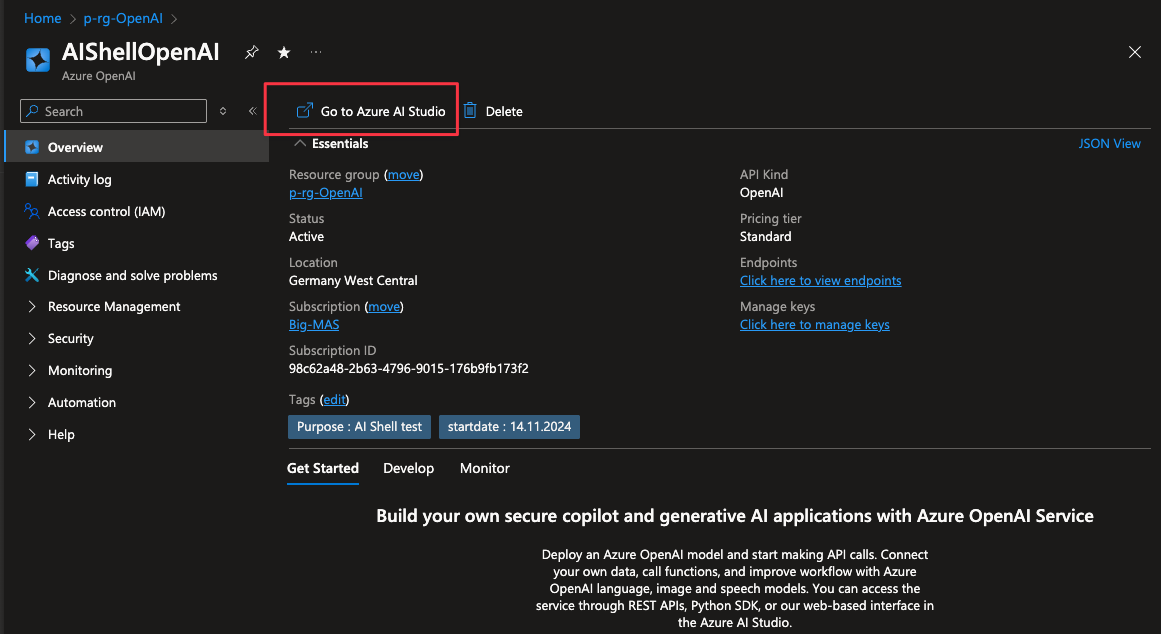
In Azure AI Studio, go to „Deployments“
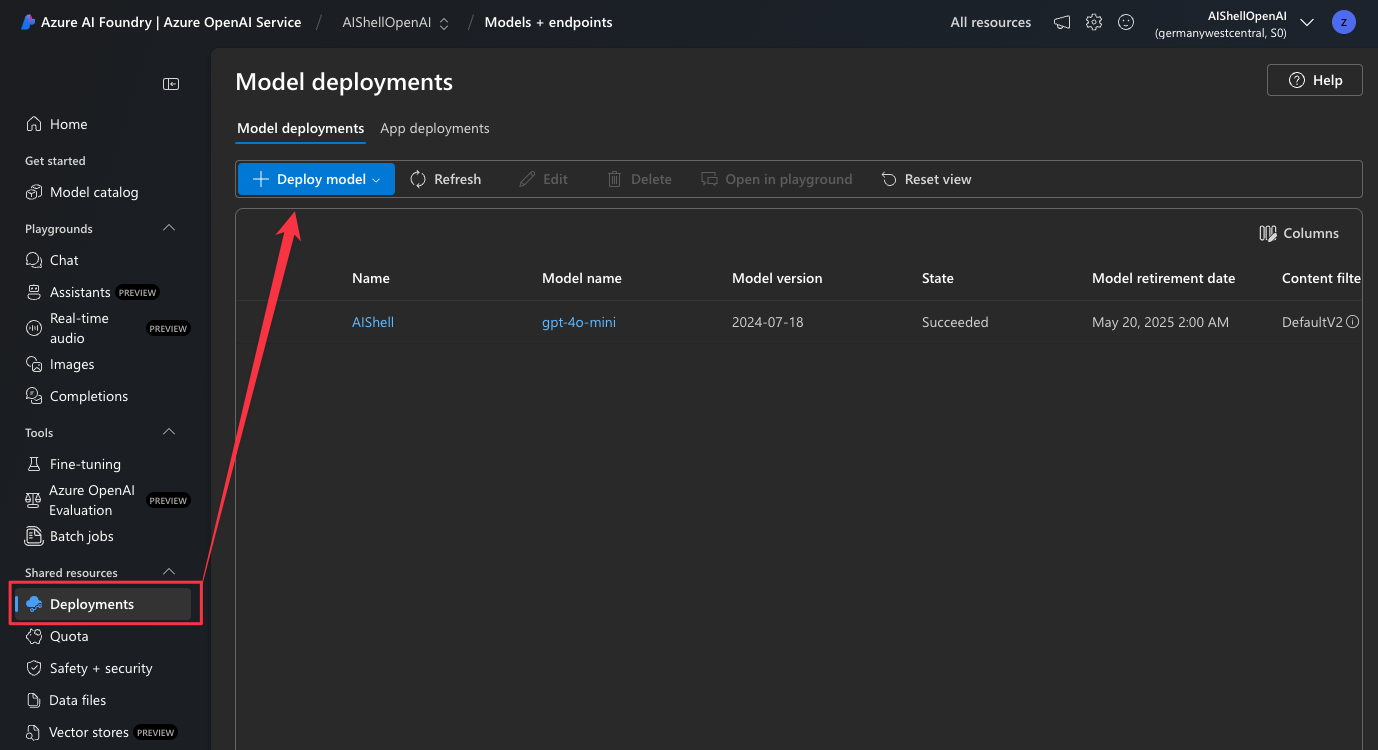
Deploy a „Base model“ and select a model of your choice.
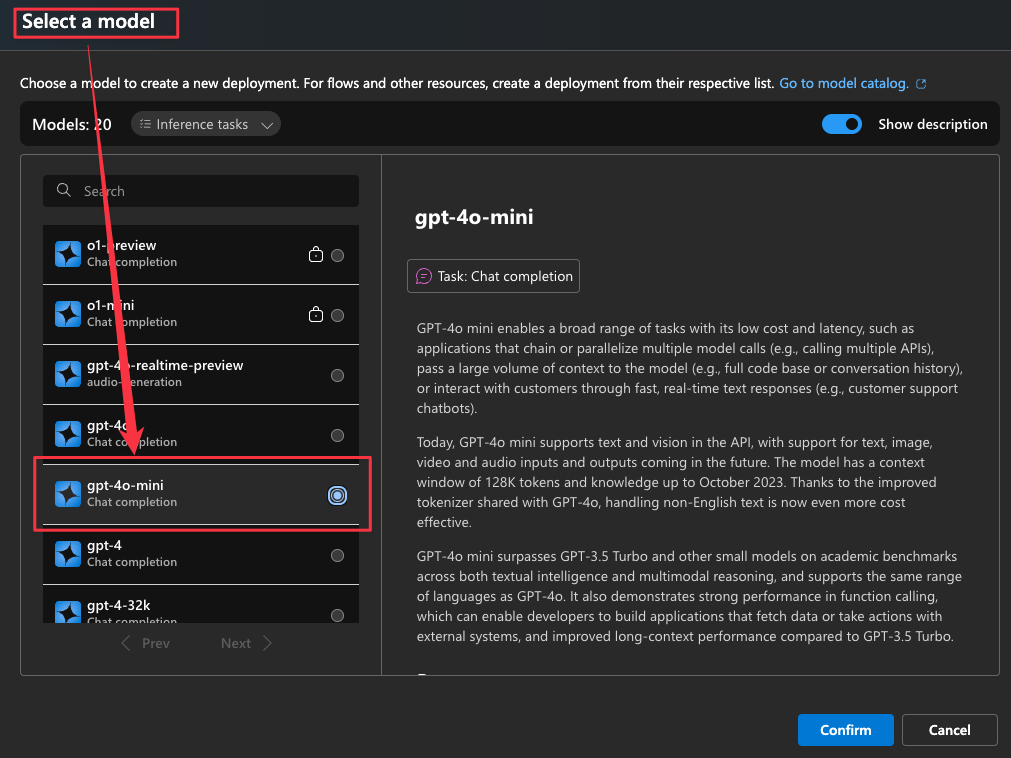
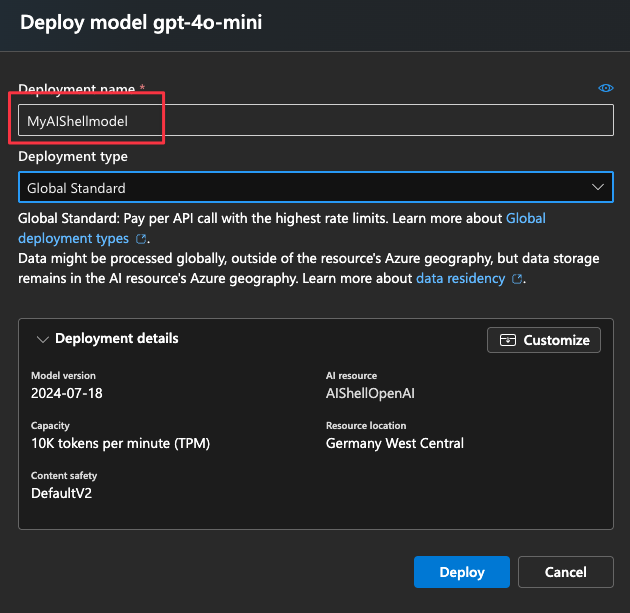
Give the Deplyoment a name and finish it.
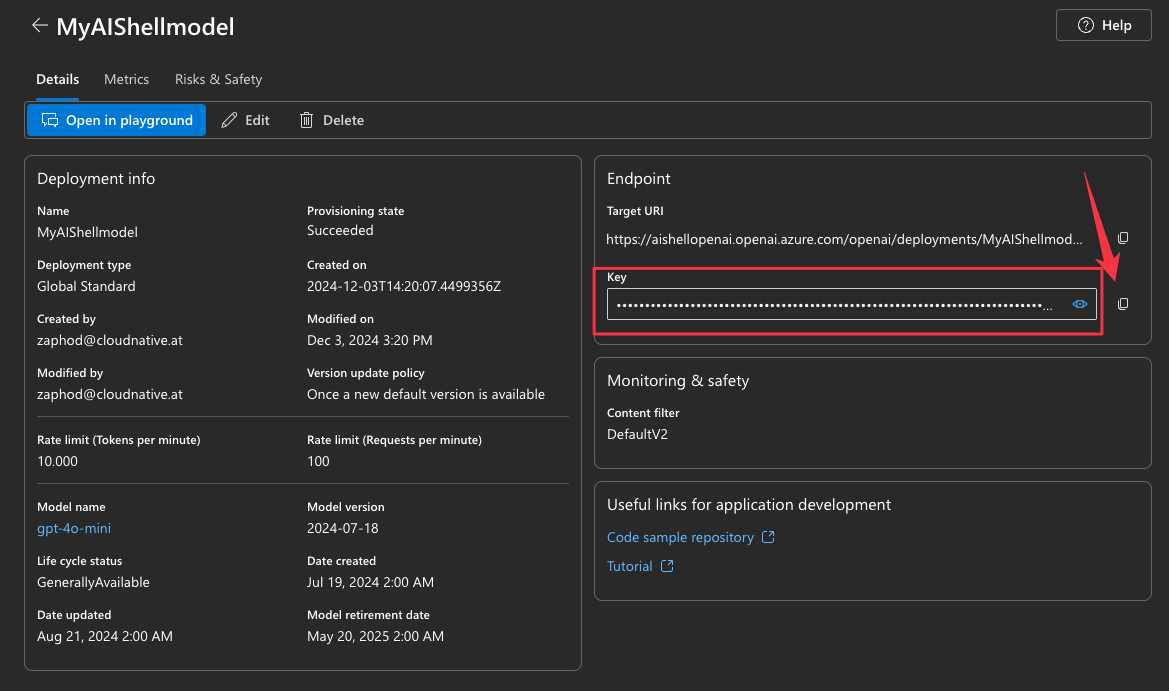
Deployment Overview and key you need for the config (I had a deployment callled AIShell already and this is the one i use).
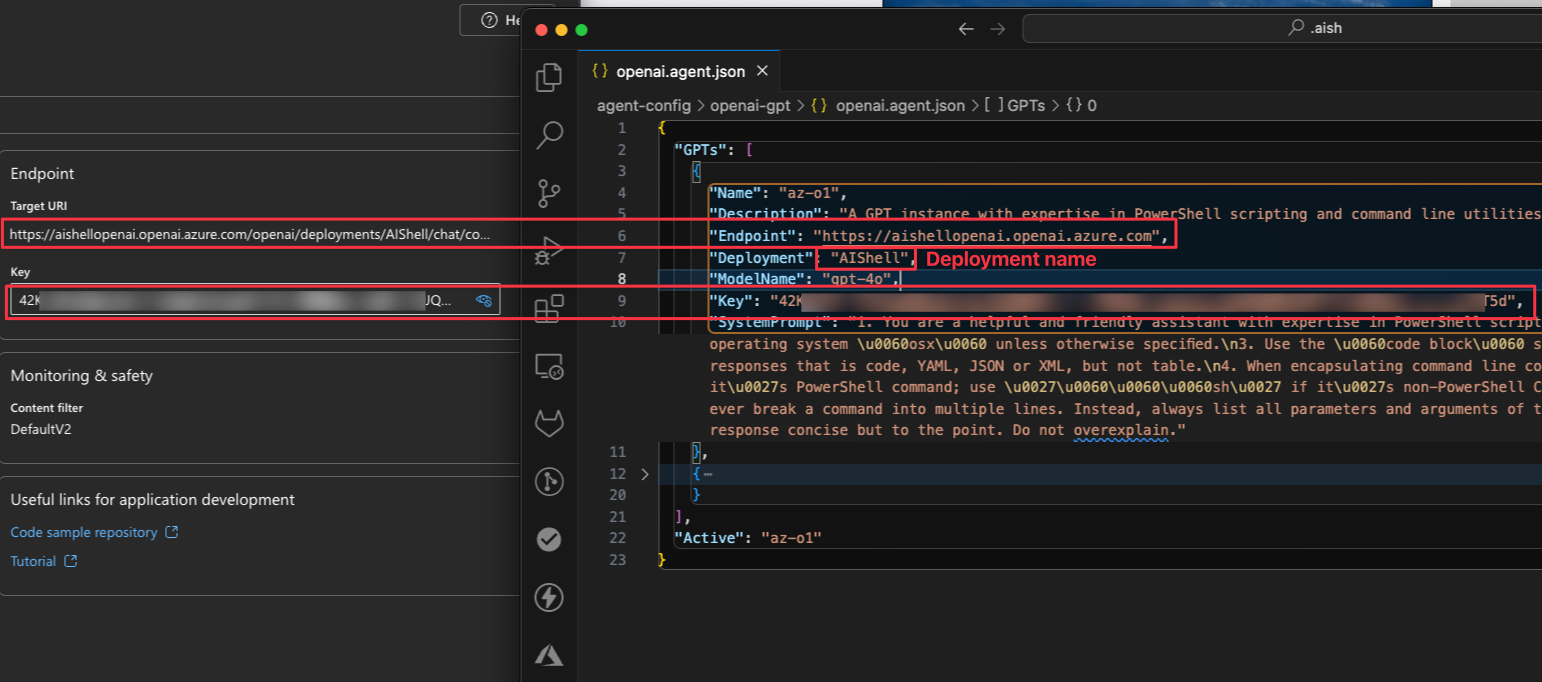
Take the deployment parameters and paste them into the configuration file as shown below. You need the deployment name and they key.
This is it, now lets see what aish can do for us.
Starting with AIshell and selecting an OpenAI deployment.
In preview-1, aish does not start as side-window on macOS, it starts as full-screen. Enough for experimenting.
Use Azure Copilot
See video for an idea of Azure Copilot.
Now you have your preview running and can learn and experiment further. use /help in aishell for available commands.
hAIppy PowerShelling.
R.
Foto von Matthew Robin Dix auf Unsplash
