Dear Community Reader !
This blog is about installing nanoserver on bare metal (HP MicroServer Gen8 in my case).

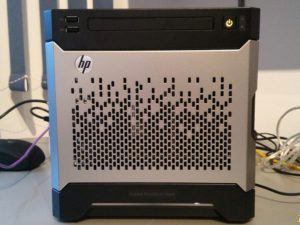
HP MicroServer Gen8 G1610T 2,3 GHz
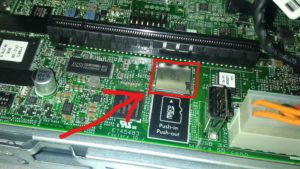
This device has many boot-options, i.e. Disks, USB Ports, Network cards and also an internal SD-Card reader.

I found the idea to boot a nanoserver from an internal SD-Cards charming, because it could be prepared on a workstation, is then stored inside the microservers case (see pictures) and the disks and SSD´s can be fully used for data and applications.
As we are here in a PowerShell blog, the frame conditions for this (and subsequent tasks are):
- Do everything in Powershell (no command-prompt programs)
- Prepare the boot media from a Windows 10 Workstation (no operations on the server itself with Preboot execution environment)
When dealing with boot-media, you need to differentiate between BIOS (old-Stype Basic-Input-Output-System) or UEFI (the new computer bios type). Both need different partition schemes of an SDCard to work.
BIOS Partition scheme

BIOS partition scheme
UEFI Partition scheme

UEFI partition scheme
The HP microserver Gen8 has a traditional BIOS, so we need to prepare a BIOS type Partition.
Start a PowerShell Session as Administrator.
Furthermore it is impoortant to know that managing more than one partition on a USB/SDCard is only possible with Windows Creators Update (march 2017) Version 1703.
So for creating BIOS-Type bootdisks, this doesnt matter, but if you plan to create a multi-partition UEFI Drive, please make sure you have Creators Update installed.
[codesyntax lang=“powershell“ title=“MBR Partition“ bookmarkname=“MBR Partition“]
|
1 2 3 4 5 6 7 8 9 10 11 12 13 14 15 16 |
# Get the disk to prepare - note down disknumber and use in next variable Get-Disk $diskNumber = Read-Host "Enter Disk Number to prepare for nanoServer" # Erase disk Clear-Disk -Number $diskNumber -RemoveData # Define as MBR Disk Initialize-Disk -PartitionStyle MBR -Number $diskNumber -ErrorAction SilentlyContinue # Create Primary Partition $priPart = New-Partition -DiskNumber $diskNumber -IsActive -UseMaximumSize Set-Partition -InputObject $priPart -NewDriveLetter 'Y' #Format Disk Format-Volume -Partition $PriPart -FileSystem 'NTFS' -NewFileSystemLabel 'nanoserver' |
[/codesyntax]
If your computer is capable of booting with UEFI Bios, the following code with create the necessary partitions
[codesyntax lang=“powershell“ title=“GPT partition“ bookmarkname=“GPT Partition“]
|
1 2 3 4 5 6 7 8 9 10 11 12 13 14 15 16 17 18 19 20 21 22 23 24 25 26 |
# Get the disk to prepare - note down disknumber and use in next variable Get-Disk $diskNumber = Read-Host "Enter Disk Number to prepare for nanoServer" # Erase disk Clear-Disk -Number $diskNumber -RemoveData # Define as GPT Disk Initialize-Disk -PartitionStyle GPT -Number $diskNumber -ErrorAction SilentlyContinue # Create Microsoft Recovery Partition $msrPart = New-Partition -DiskNumber $diskNumber -Size 256MB -GptType '{e3c9e316-0b5c-4db8-817d-f92df00215ae}' # Create and set EFI Partition $efiPart = New-Partition -DiskNumber $diskNumber -Size 256MB -GptType '{C12A7328-F81F-11D2-BA4B-00A0C93EC93B}' Set-Partition -InputObject $efiPart -NewDriveLetter 'X' # Create Primary Partition $PriPart = New-Partition -DiskNumber $diskNumber -UseMaximumSize Set-Partition -InputObject $priPart -NewDriveLetter 'Y' #Format Disks Format-Volume -Partition $efiPart -FileSystem 'FAT32' -NewFileSystemLabel 'EFI' Format-Volume -Partition $PriPart -FileSystem 'NTFS' -NewFileSystemLabel 'nanoserver' |
[/codesyntax]
Thats it! – Next steps will be to prepare the nanoserver-image for the server. Watch out for the next blog…